![]() Learn how to install Mac OS X 10.11 El Capitan on an external drive. Before upgrading to the latest Mac OS X, it is often useful to install Mac OS X on an external hard drive for testing. Especially, if you want to get a very first view on a Mac OS X 10.11 developer preview or public beta without replacing the final release version of the operating system. The following step-by-step tutorial works in the same way for installing Lion, Mountain Lion, Mavericks and Yosemite (final release versions, developer previews, public beta) on an external volume. Update: Installing macOS 10.13 High Sierra or macOS 10.12 Sierra is working in the same way.
Learn how to install Mac OS X 10.11 El Capitan on an external drive. Before upgrading to the latest Mac OS X, it is often useful to install Mac OS X on an external hard drive for testing. Especially, if you want to get a very first view on a Mac OS X 10.11 developer preview or public beta without replacing the final release version of the operating system. The following step-by-step tutorial works in the same way for installing Lion, Mountain Lion, Mavericks and Yosemite (final release versions, developer previews, public beta) on an external volume. Update: Installing macOS 10.13 High Sierra or macOS 10.12 Sierra is working in the same way.
1. Hard Ware Requirements
The installation of Mac OS X 10.11 El Capitan on an external hard drive works on a SD Card, USB flash drive, USB drive or any other external hard drive connected via USB 2.0, USB 3.0, FireWire or Thunderbolt. However, the best choice is an external drive connected via USB 3.0 (up to 5 Gb/sec), Thunderbolt (up to 10 Gb/s) or Thunderbolt 2 (up to 20 Gb/sec) due to transfer speed reasons. With USB 2.0 the speed (up t0 0.25 Gb/sec) is significantly slower, the experience on USB 1.0 is unacceptable. For details about the high-speed I/O performance see Apple’s Thunderbolt page.
Although the OS X installers are much smaller (approx. 5 GB), Apple states in the support document ‘OS X: Installing OS X on an external volume‘ that “the storage device must have at least 13 GB available (after formatting) to install OS X Lion or later and a Recovery partition“.
Hardware used:
- G-Technology G-DRIVE mobile USB, 1TB, Portasble USB 3.0 Drive, 7200 RPM (transfer rates up to 136MB/sec) External Drive (0G02874). Note: 5400 RPM version got transfer rates up to 100MB/sec.
- MacBook Pro 13” Retina, Late 2013, processor 2,6 GHz Intel Core i5, memory 8 GB 1600 MHz DDR3, graphics Intel Iris 1536 MB
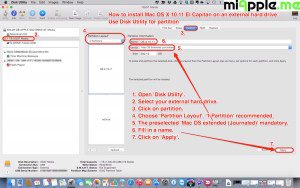
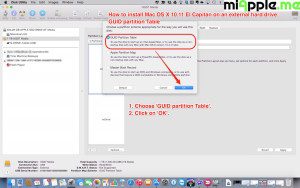
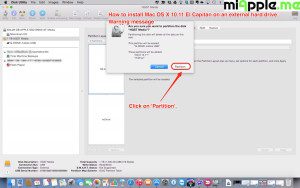
2. Formatting an External Volume / Hard Drive
3. Downloading the OS X Yosemite Installer
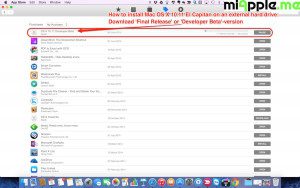
- Open ‘Mac App Store‘ and click ‘Purchases‘.
- Supposing you previously purchased any Mac OS X or got an Apple developer account, you will see ‘OS X El Capitan‘ (or ‘OS X Lion‘, ‘OS X Mountain Lion‘ and/or ‘OS X Yosemite‘). Developers will additionally see the Developer Preview, e.g. ‘OS X 10.10 Developer Preview‘.
- Click on ‘Download‘ to download the OS X installer you want to get.
- If that does not work, search via Spotlight for the OS X installer on your Mac, as it may already have been downloaded.
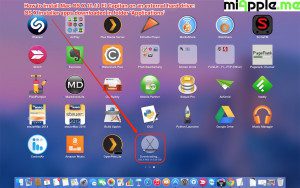
- The OS X installer is normally downloaded to your ‘Applications‘ folder.
4. Install OS X El Capitan on External Drive
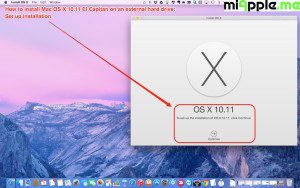
- Start the desired OS X installer (Lion, Mountain Lion, Yosemite, El Capitan, Public Beta or Developer preview)
- Read the terms and conditions. You’ll need to click on ‘Agree‘ in order to continue with the installation.
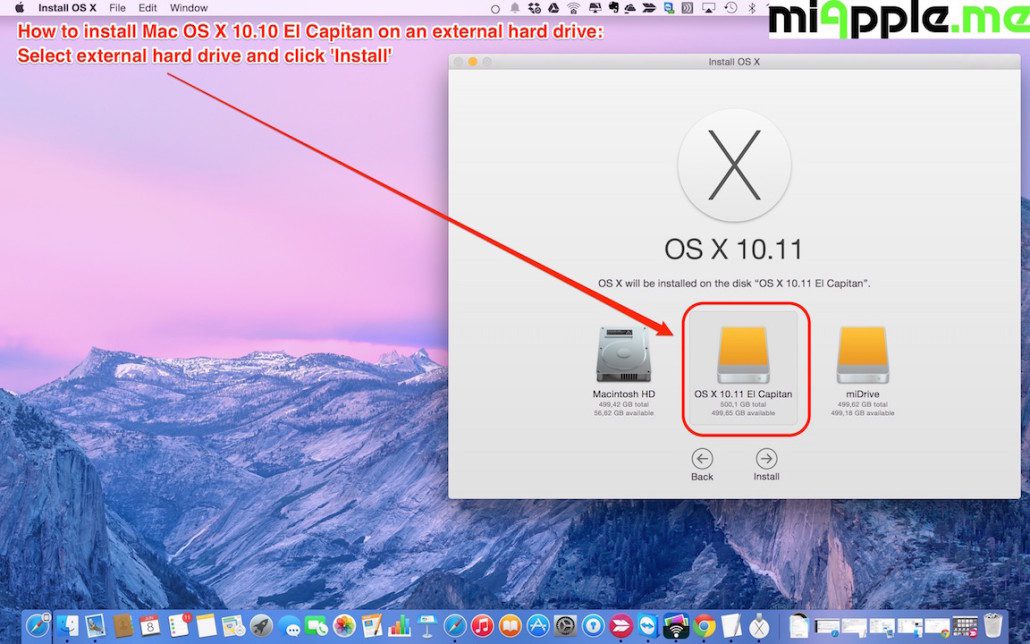
- For seeing all connected hard drives of your mac, click the button ‘Show All Disks…‘.
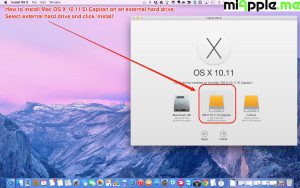
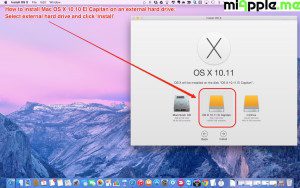
- Select the external hard drive you want to install the operating system and click on ‘Install‘.
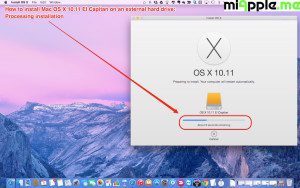
- The next prompted windows will show the the remaining time and the progress bar will indicate the status of the installation.
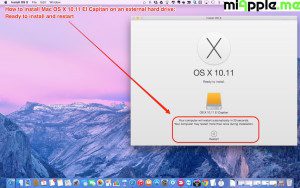
- Then, your Mac will then count down from 30 seconds before restarting. Click on ‘Restart‘ to accelerate the process. Your Mac will restart and finish the installation process.
Note: After finishing the installation, your Mac will reboot into the version of OS X that you installed to the external volume!
5. Choosing the hard drive for rebooting
By default, your Mac will now always reboot into the version of OS X that you installed on the external drive. But you can choose the reboot drive in the System Preferences:
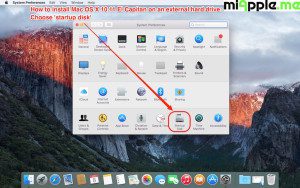
- Go to the Apple Logo, click on ‘System Preferences…‘.
- Select ‘Startup Disks’.
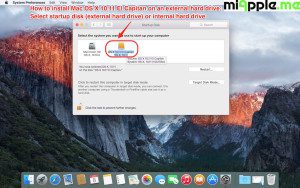
- Now you can choose the boot volume, either the Mac’s internal hard drive or the external hard drive.
- Close the window and you’re done! 🙂
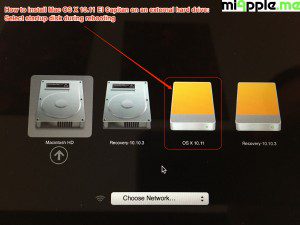
An alternate option during restarting your Mac is the following:
- When your Mac restarts, listen out for the startup chime.
- Immediately after the chime sounds, press and hold down the ‘Option‘ key (sometimes marked ‘Alt‘).
- After a short time, you will see all bootable startup disks on your Mac (internal and external ones, if connected). Use the left and right arrow keys to navigate to the external drive and press ‘Enter‘.
7. Summary
Installation of a Mac OS X or macOS operating system (Lion, Mountain Lion, Yosemite, El Capitan, macOS Sierra, macOS High Sierra) on an external hard drive is an excellent option the test an operating system. Due to performance reasons, you should use USB 3.0 external hard drives at least.
Stay tuned! 😉


14 Comments
Pingback: How To Recover Lost Admin Rights On macOS Big Sur, High Sierra and Sierra, Mac OS X El Capitan And Yosemite - miapple.me
Sorry I just realized Jeremy has the same request. High Sierra does not support Final Cut Pro 7 or any of the associated products like DVD Studio Pro, etc.
Hi Bill,
do you mean to downgrade from High Sierra to El Capitan?
Cheers, Gee Are
I downloaded the Install El Capitan.app from the app store but I can not open it as I get an error message – This copy of Install OS application is too old to open on this version of OS X. I just upgraded to High Sierra
Hi hibibby, do you want to downgrade from High High Sierra to El Capitan? Cheers, Gee Are
I want to install el capitan on a external drive but I am running sierra and when I try to run the installer it says this copy of the install os x application is too old to be opened on this version of os x. how do I get around this.
Hi Jeremy, do you want to downgrade to El Capitan? Cheers, Gee Are
I am trying to download OS X onto an external hard drive because I don’t have enough startup disc space left on my MacBook Air to do much of anything. But following your directions leads me to a dead end when I can’t specify that I want to download OS X onto an external drive. It just gives me the notification that there is not enough space. If that’s a catch 22 because I still need more space on my startup disc, how do I get more space on my startup disc?
After I installed the first version of El Capitan (public beta), the updates do not auto-install from external startup. The external starts up fine but installing updates fails miserably. I think it’s because the drive, for some unknown reason, reverts to the internal after the update finishes. I am SURE that the System Prefs are checked to reboot to the external, however the automatic restarts only partially redirect the update somehow. It crashes badly (kernel crash). It also crunches the drive so that the only recovery is by reinstalling the OS by the method you describe, which apparently does fix the issue. So this means that I’m at a dead end, a Cath-22, with no future upgrade path, as the updates are not installable from another drive, SFAIK. Are there any workarounds to this?
Hi Henry,
sounds wired. Have you already checked the alternate boot option via the ‘alt’ key mentioned in this post to boot to El Capitan?
Cheers,
Gee Are
I installed El Capitan on an external drive. I can boot-up. However, I have lost ‘Admin’ access. The user that I login with is only a ‘Standard’ user, not an Admin user. Have not found a solution yet.
Hi Albert,
here’s the solution for your lost admin rights on Mac OS X 10.11 El Capitan:
https://miapple.me/how-to-recover-lost-admin-rights-on-os-x-10-11-el-capitan-and-10-10-yosemite/
Cheers,
Gee Are
There is a solution.
https://miapple.me/how-to-recover-lost-admin-rights-on-os-x-10-11-el-capitan-and-10-10-yosemite/
RT @miAppleMe: How To Install Mac OS X 10.11 El Capitan On An External Drive https://t.co/Ksn1Lsa2eA http://t.co/JU6CFISKwu