![]() Sometimes you need to resize, shrink or add a drive to Windows 8 or Windows 8.1. For example, if you want to create a dual-boot option on your Windows 8 or 8.1 PC, you need to have a free drive or partition. If you have not already one, you first must shrink your primary boot drive to get free drive space for the second boot drive using the Disk Management Utility program. Then you can add a new boot drive.
Sometimes you need to resize, shrink or add a drive to Windows 8 or Windows 8.1. For example, if you want to create a dual-boot option on your Windows 8 or 8.1 PC, you need to have a free drive or partition. If you have not already one, you first must shrink your primary boot drive to get free drive space for the second boot drive using the Disk Management Utility program. Then you can add a new boot drive.
Here’s the detailed ‘How-to’ resize, shrink and add a new bootable drive to Windows 8 and Windows 8.1, especially for installing Windows 10 (Technical Preview) in dual-boot mode:
Note: Minimum requirement is a 20 GB free disk space for installing Windows 10 (technical preview). If you plan to install apps, the more space you can shrink, the better it is. My recommendation is a free disk space of at least 50 GB.
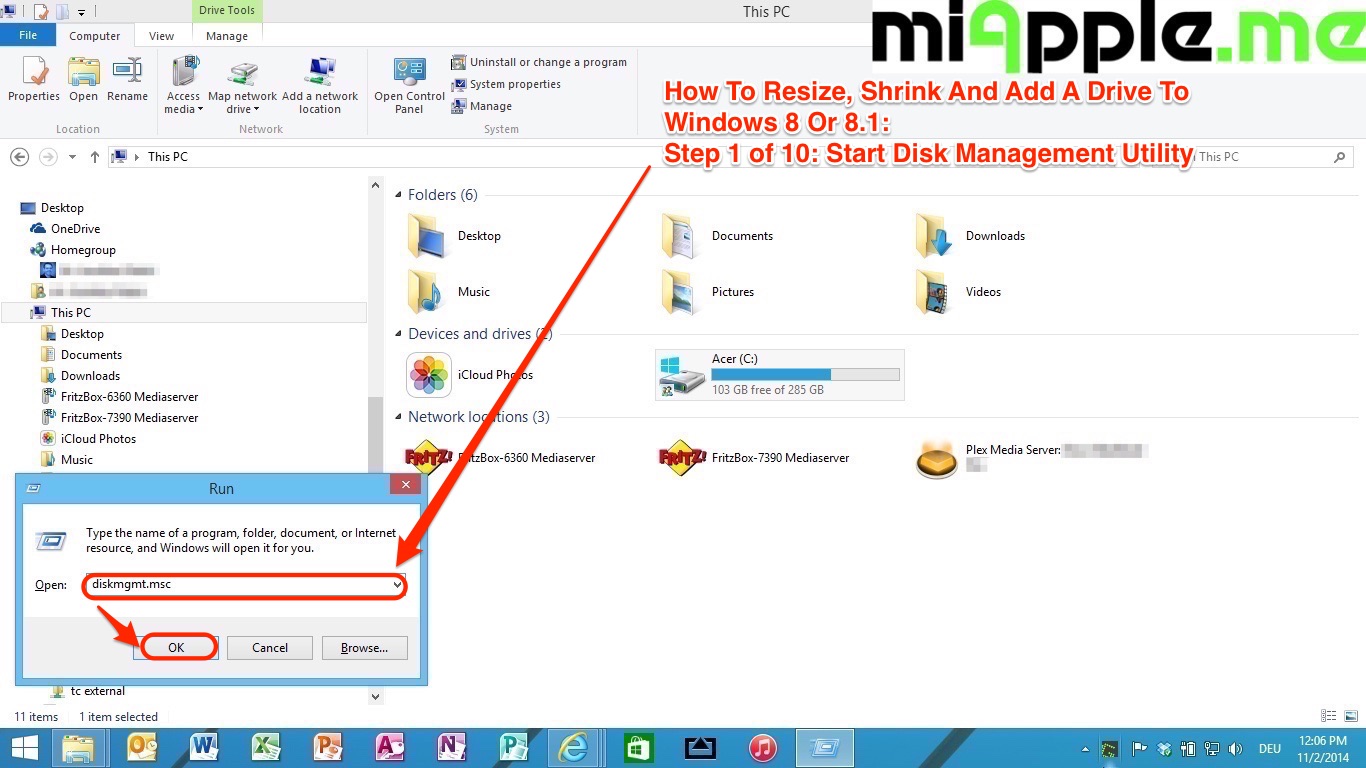
- Start the Disk Management Utility of Windows 8 / 8.1. Press ‘Windows Key + R‘, type ‘diskmgmt.msc‘ into the Run dialog and press ‘Enter‘ to launch it.

How To Resize, Shrink And Add A Drive To Windows 8 Or 8.1:
Step 1 of 10: Start Disk Management Utility - Make a right mouse click on your C: drive and select ‘Shrink Volume…‘.
How To Resize, Shrink And Add A Drive To Windows 8 Or 8.1:
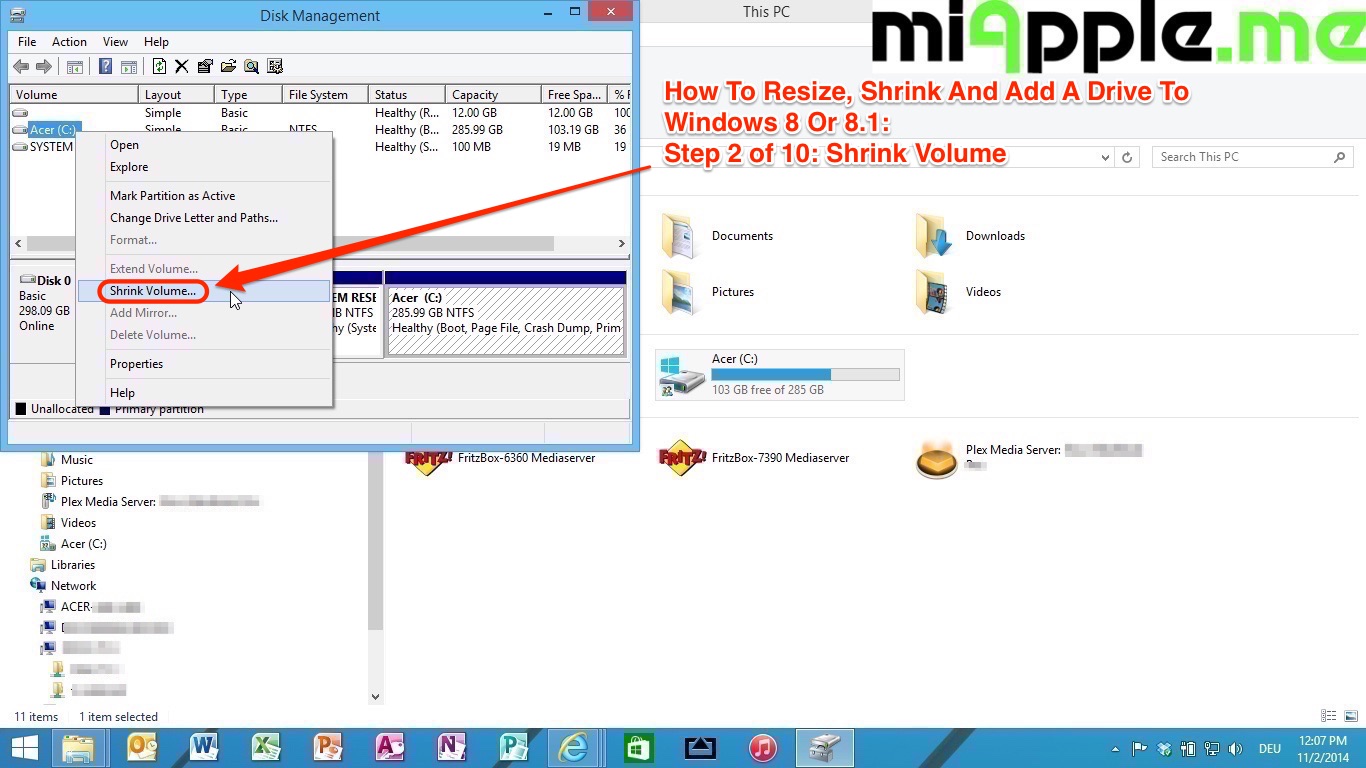
Step 2 of 10: Shrink Volume - Enter the amount to shrink the C: drive in MB to define the size of your Windows 10 drive. Minimum requirement is a 20 GB free disk space for installing Windows 10 (technical preview). If you plan to install apps, the more space you can shrink, the better it is. Click ‘Next‘.
How To Resize, Shrink And Add A Drive To Windows 8 Or 8.1:
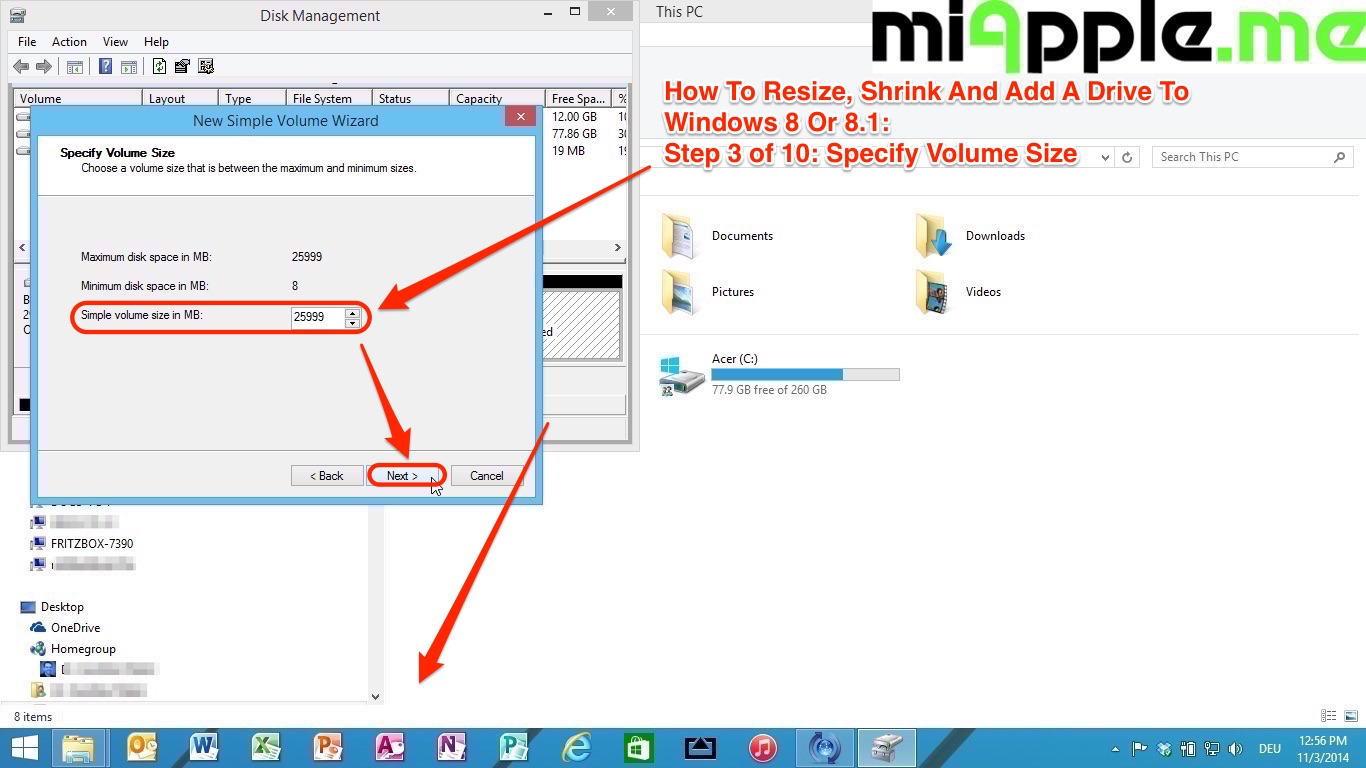
Step 3 of 10: Specify Volume Size - After the shrinking process had ended, a blockofunallocated space, roughly equal to the amount you shrunk, appears.
How To Resize, Shrink And Add A Drive To Windows 8 Or 8.1:
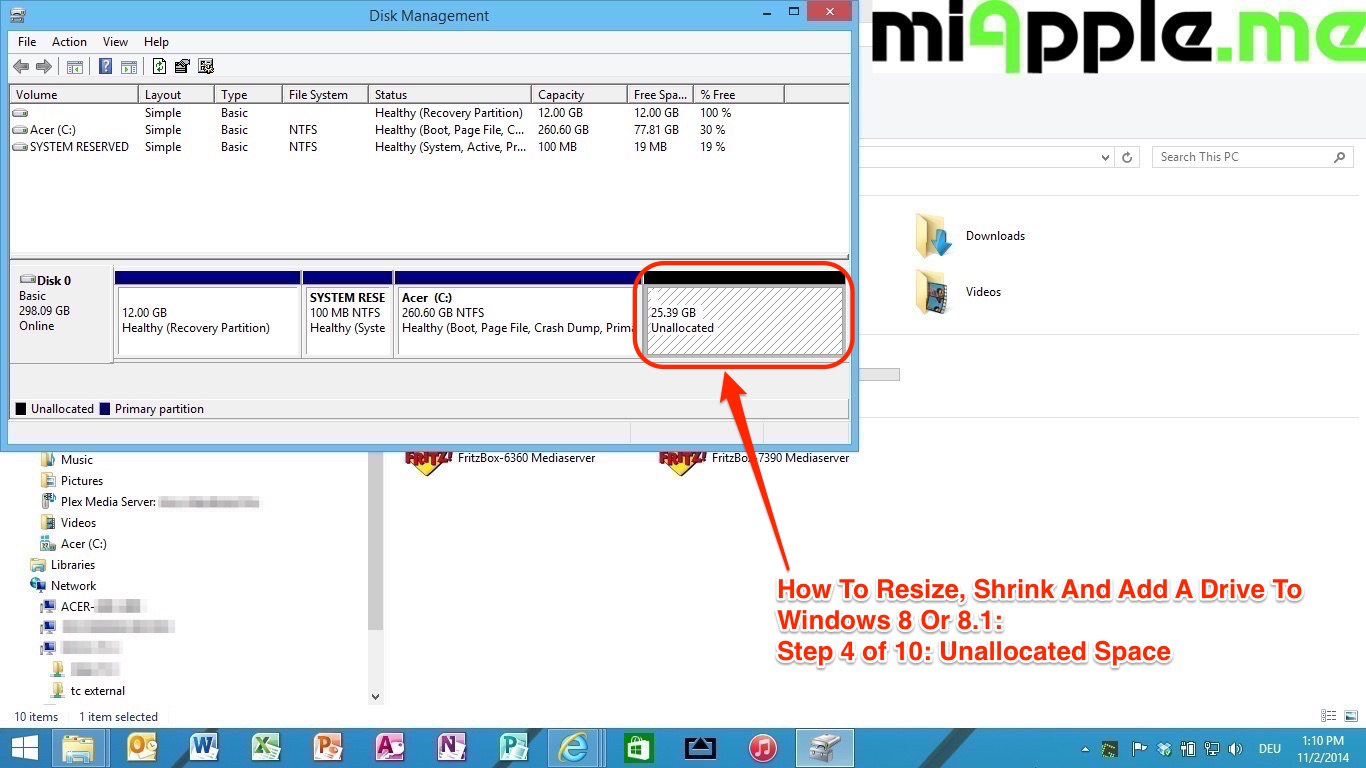
Step 4 of 10: Unallocated Space - Make a right mouse click on the unallocated space and select ‘New Simple Volume‘.
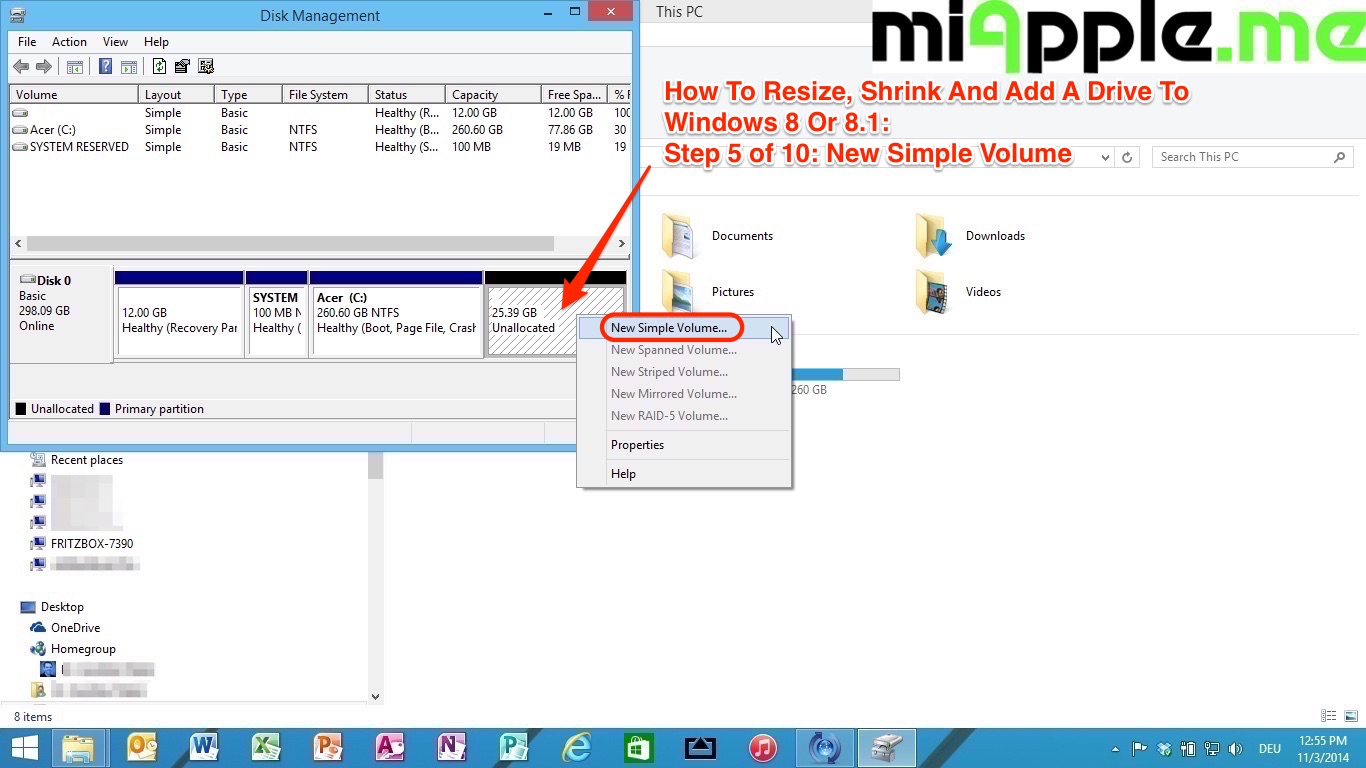
How To Resize, Shrink And Add A Drive To Windows 8 Or 8.1:
Step 5 of 10: New Simple Volume - The ‘New Simple Volume Wizard‘ appears. Click ‘Next‘.
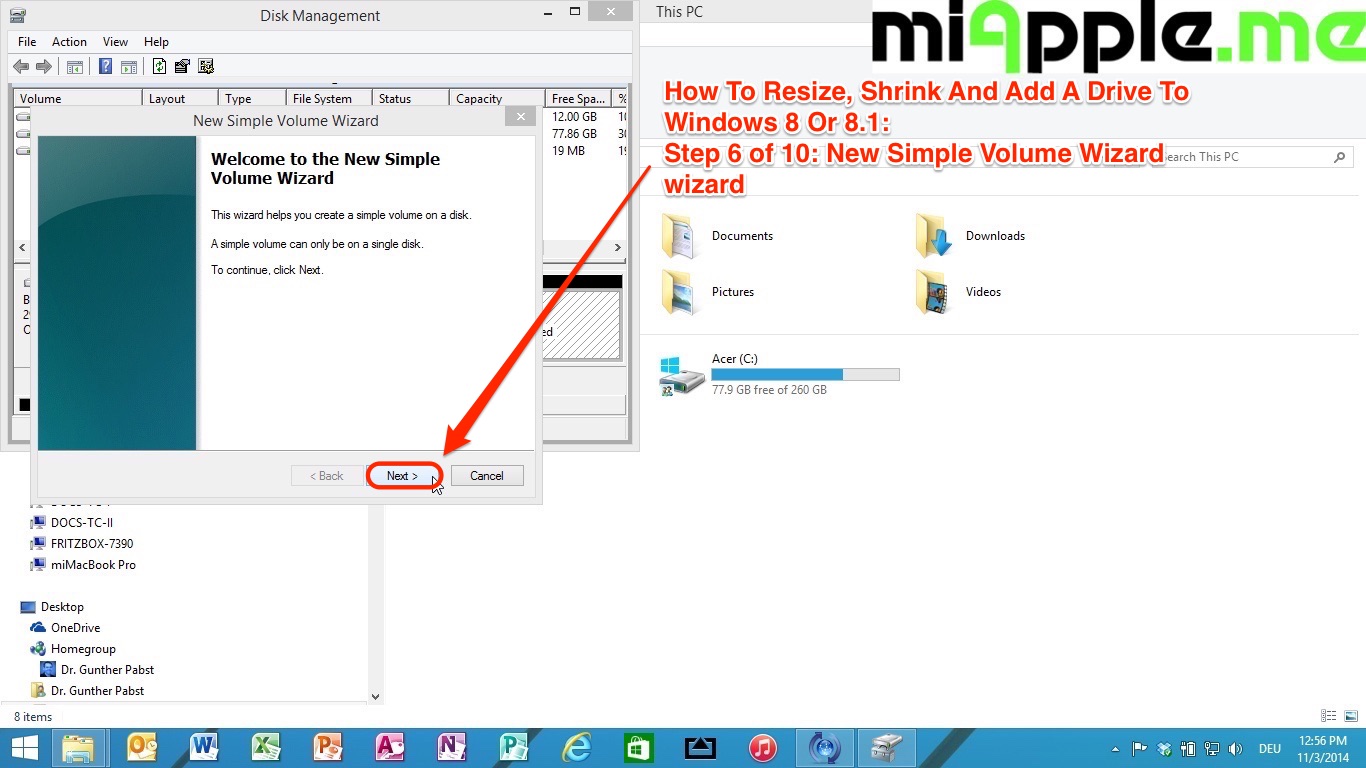
How To Resize, Shrink And Add A Drive To Windows 8 Or 8.1:
Step 6 of 10: New Simple Volume Wizard
wizard - Click ‘Next‘ to assign a drive letter. It doesn’t matter which letter you choose.
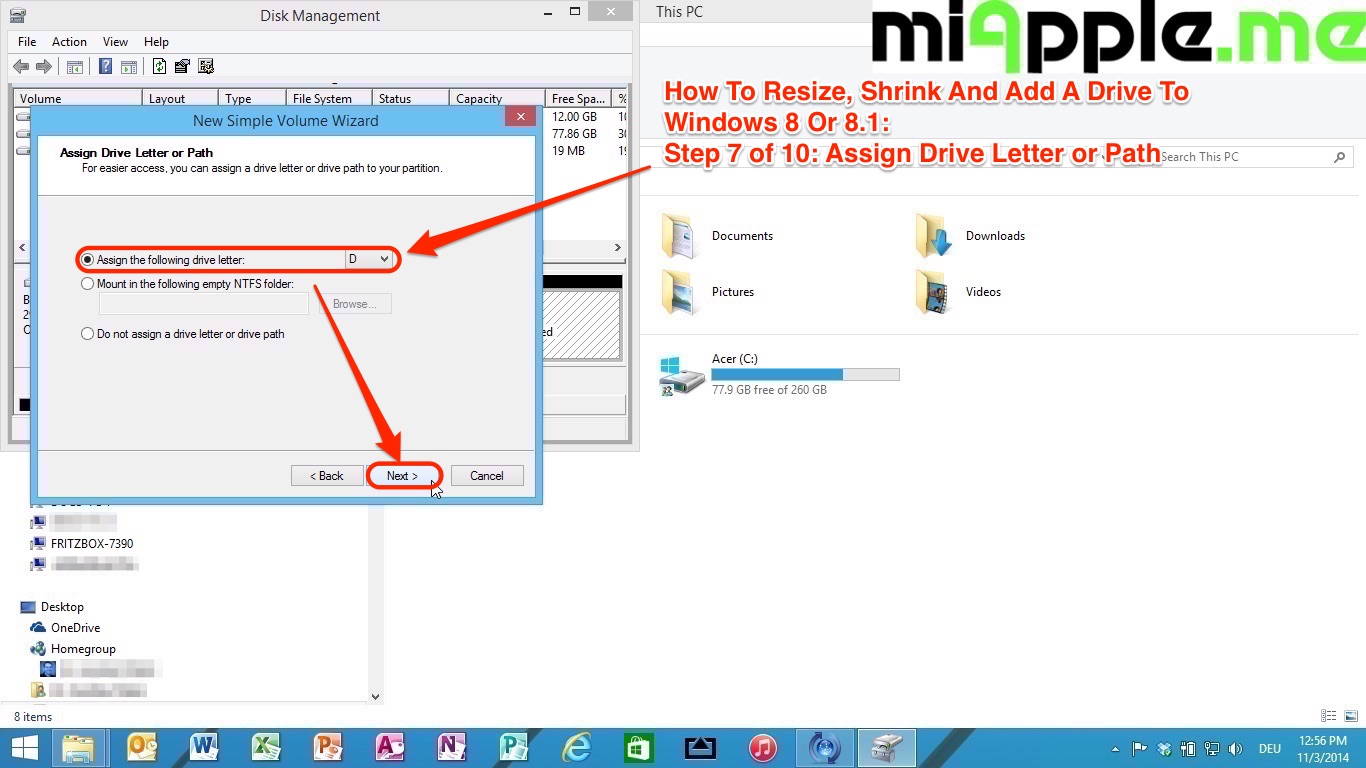
How To Resize, Shrink And Add A Drive To Windows 8 Or 8.1:
Step 7 of 10: Assign Drive Letter or Path - Select ‘Format this volume with the following settings‘ and click ‘Next‘.
How To Resize, Shrink And Add A Drive To Windows 8 Or 8.1:
Step 8 of 10: Format Partition - Click ‘Finish‘.
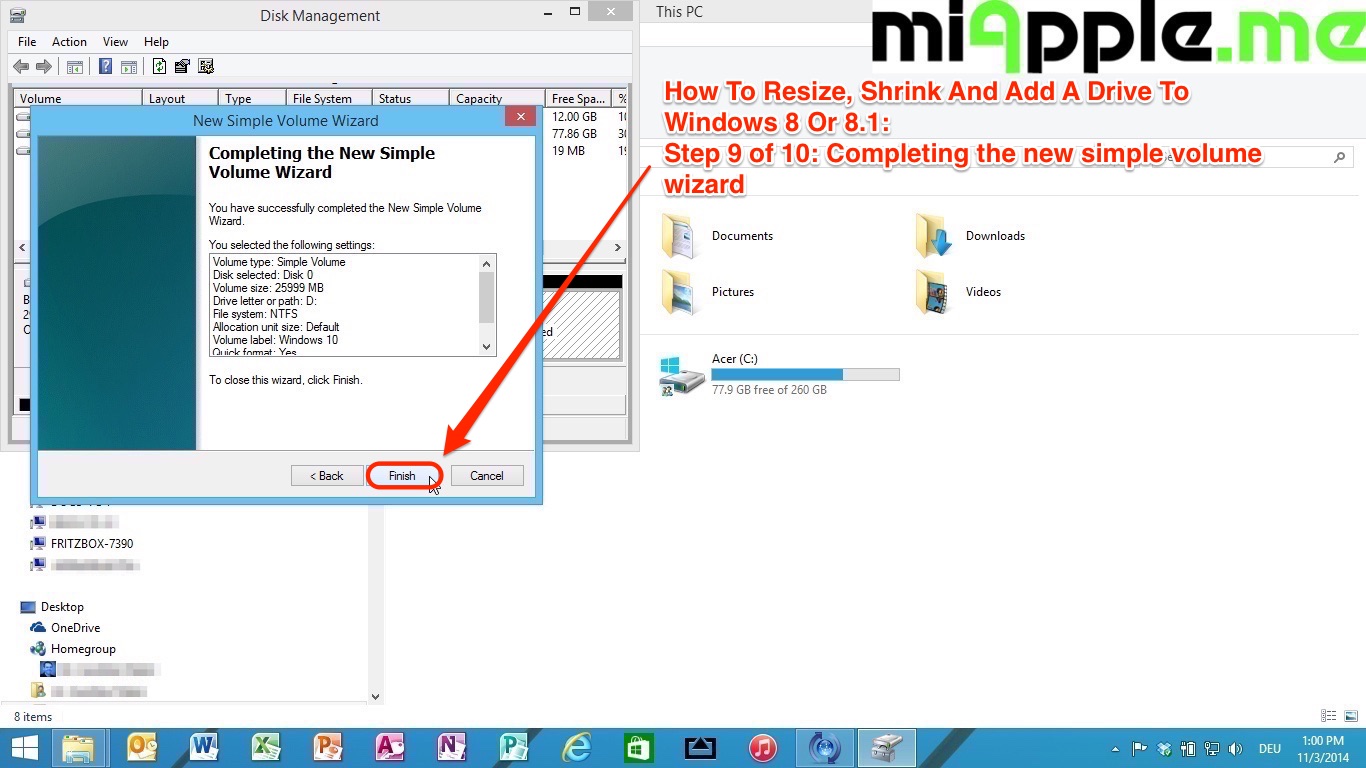
How To Resize, Shrink And Add A Drive To Windows 8 Or 8.1:
Step 9 of 10: Completing the new simple volume
wizard - Now you got new partition / bootable drive!
How To Resize, Shrink And Add A Drive To Windows 8 Or 8.1:
Step 10 of 10: New bootable drive created


Now you added a second bootable drive / partition to Windows 8 or Windows 8.1 by resizing / shrinking your primary partition using the Disk Management Utility program, e.g., for installing Windows 10 (Technical Preview) on your Windows PC in dual-boot mode. Another option to install Windows 10 (Technical Preview) is a virtual machine like VirtualBox.
Stay tuned! 😉
2 Comments
Pingback: Fixing 'Cannot Extend Volume' Or 'Cannot Shrink Volume' On Windows 10, 8.1 and 8 - miApple.me
How To Resize, Shrink And Add A Drive To Windows 8 Or 8.1 http://t.co/WGG89vjl6M http://t.co/MMeIqzhy69