
![]() Do you want to downgrade Windows 10 to Windows 7, Windows 8 or Windows 8.1? Three options to downgrade and uninstall Windows 10 are available, depending on your Windows PCs setup: Recover your previous Windows 7 / Windows 8 / Windows 8.1 installation by uninstalling Windows 10, downgrade Windows 10 by using you previous Windows 7, Windows 8 or 8.1 backup and downgrade Windows 10 by a clean installation of Windows 7, Windows 8 or 8.1.
Do you want to downgrade Windows 10 to Windows 7, Windows 8 or Windows 8.1? Three options to downgrade and uninstall Windows 10 are available, depending on your Windows PCs setup: Recover your previous Windows 7 / Windows 8 / Windows 8.1 installation by uninstalling Windows 10, downgrade Windows 10 by using you previous Windows 7, Windows 8 or 8.1 backup and downgrade Windows 10 by a clean installation of Windows 7, Windows 8 or 8.1.
Recovery option: How to downgrade / uninstall Windows 10 and recover your previous Windows installation
- Go to the Settings app (shortcut Windows key + I) and click on ‘Update & Security‘ and select ‘Recovery‘. If your system is still eligible for downgrading, you see the option ‘Go back to Windows 8.1‘ / ‘Go back to Windows 8‘ / ‘Go back to Windows 7‘. Click the ‘Get started‘ button for proceeding.

Downgrade Windows 10_01_go back to Windows 8.1 option avalaible - Select an option why you’re going back, e.g. ‘for another Reason‘ and then click ‘Next‘.
Downgrade Windows 10_02_why are you going back - Answer the next question “Check for updates?” with ‘No, Thanks‘.
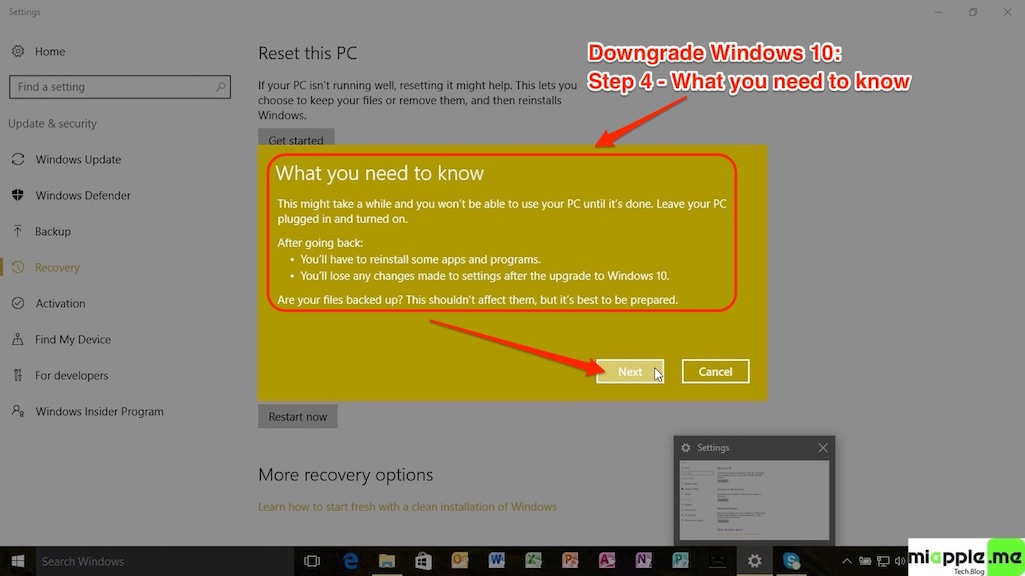
Downgrade Windows 10_03_check for updates option - Now you get a warning that you need to reinstall some apps and programs, and you will lose any changes made after upgrading to Windows 10. A file backup is not necessary, but recommended. Then click ‘Next‘.
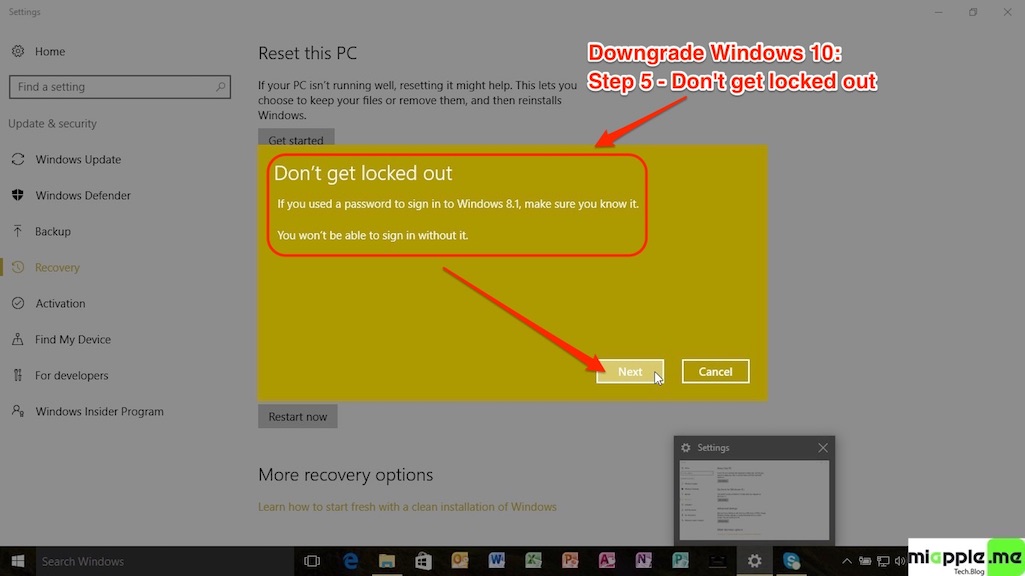
Downgrade Windows 10_04_what you need to know - Make sure you know your Windows 8.1 password as you’ll be locked out of the system without it. If you signed in with your Microsoft ID, you have to use its password. Click ‘Next‘.
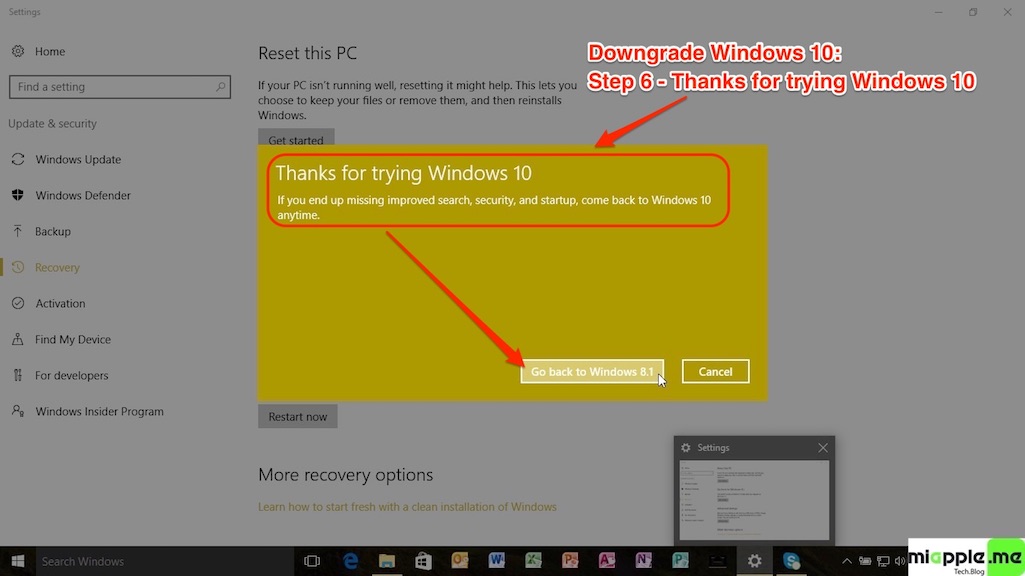
Downgrade Windows 10_05_don’t get locked out - Finally, click on ‘Go back to Windows 8.1‘ / ‘Go back to Windows 8‘ / ‘Go back to Windows 7‘ and let the process complete.
Downgrade Windows 10_06_thanks for trying Windows 10


Notes:
- Make a backup of your system before downgrading!
- The process will take some time depending on your system configuration. Once you’re back on Windows 8.1, don’t forget to check all your apps are installed correctly and check for new updates, as, after a few weeks, it’s likely to be out-of-date.
- The windows 8.1 back up folders are ‘Windows.old‘ and the invisible folder ‘$WINDOWS.~BT‘ and will be deleted after 30 days of upgrading to Windows 10. Make ‘$WINDOWS.~BT‘ visible and rename both folders to avoid the automatic deletion by the windows system to still have the option of downgrading after 30 days.
Downgrade Windows 10_07_Windows 8.1 backup folders - If it’s been over a month — or if you’ve run the Disk cleanup tool and removed the “Previous Windows installations” files or deleted the C:\Windows.old folder by hand — you’ll no longer see this option. Windows 10 appears to automatically remove the old Windows installation files after a month to free up space.
Downgrade Windows 10_08_go back to Windows 8.1 option no longer available - Microsoft’s process will preserve your local files, but not settings or third-party programs.


Backup option: How to downgrade / uninstall Windows 10 by using you previous Windows 7, Windows 8 or 8.1 backup
If you created a full backup of your computer before upgrading to Windows 10, you can simply make a new backup of your new files since the last full backup or just make a copy of all your files to an external hard drive. Also, note any new software installation since the last full backup, as you’ll need to reinstall them after rolling back.
You can do this by:
- Searching for Control Panel with Cortana.
- Navigating to ‘Programs and Features‘.
- Arranging the list of apps in your system by ‘Installed On‘.
- Once you have the backup of your files, and you know the apps you need to install, reboot your computer using the ‘repair disk‘, which you’re prompted to create after creating the initial full backup.
Note: If you don’t have repair disk, you can also boot with the Windows 8.1 / 8 / 7 ISO files to perform the recovery (see Clean Install Option).
After rebooting, follow these steps:
- While in the Setup wizard, click ‘Next‘, and then ‘Repair your computer‘.
- Click ‘Troubleshoot‘, and then click ‘Advanced options‘, and select ‘System Image Recovery‘.
- Select the operating system you to recover from, click ‘Next‘, and then ‘Finish‘ to begin with the recovery process.
Once the process completes, you’ll be back to the previous version of your operating system, in this case, Windows 8.1.
Now, if you have made a lot files changes, it’ll be recommended you delete all of your files and restore the updated versions using the new backup you created before downgrading back to Windows 8.1. Also, don’t forget reinstall any software since the last backup.
Clean install option: How to downgrade /uninstall Windows 10 by a clean installation of Windows 7, Windows 8 or 8.1
- Make a bootable USB flash drive the Windows 8.1, 8 or 7 ISO file.
- Reboot your computer with the Windows 8.1 / 8 / 7 bootable USB flash drive (make sure your PC is set to boot from the drive with installation files).
- During the Windows Setup, click ‘Next‘, accept the licensing, and click ‘Next‘.
- Click the option ‘Custom: Install Windows only (Advanced)‘ option to do a clean installation.
- Delete any partition created by you current operating system.
- Select the empty drive and click ‘Next‘ to begin the installation process.
Notes:
- If you have a dedicated partition to store files or a secondary hard drive, you don’t have to delete these partitions. After the installation process completes, you’ll be back to your previous version of Windows.
- Now the only thing left is to restore your documents and other files from the backup, and you’ll need to re-install any software you have previously installed.
Using one out of three options to downgrade Windows 10 to Windows 8.1, Windows 8 or Windows 7 let you recover your previous Windows installation.
Stay tuned! 😉
1 Comment
Nice post! I’ve got an old Windows 7 desktop that I mostly use for games, but my main machine now is a MacBook Pro. Since I barely use the desktop anymore, I declined the Windows 10 update last summer, but it’s nice to know Microsoft is letting users roll back like that. Cheers!