 Setting up a FTP server on Windows 8 and Windows 8.1 can be done easily by using the built-in FTP server of Windows 8 and Windows 8.1. You can access the FTP server via LAN, WLAN or VPN (Virtual Private Network) outside your home network. Although you can set up any computer as FTP server by installing third-party applications like FileZilla FTP server, this step-by-step guide shows how to set up FTP server on Windows 8 or Windows 8.1 without installing any third-party software or tools. I set up the Windows FTP server on my Acer Aspire 1810T running on Windows 8.1 Preview.
Files and folder can always easier shared on an internal or external network via a FTP server. With the correct set up and in conjunction with special apps you can get access to your computer from an iPhone, iPad or iPad touch. Windows 8 and Windows 8.1 come with a built-in FTP server under Internet Information Service features which needs to be installed before use. You can allow access other users to your FTP site by restricting with user name and password or anonymous access, too.
Now let’s start setting up a built-in FTP server on Windows 8 or Windows 8.1. I installed the FTP server on my Acer Aspire 1810T running on Windows 8.1 Pro Preview. In the following I show you two options: Setting up your Windows PC as a common FTP server and as a FTP server for getting access to your local files via FTP apps from your iPhone, iPad or iPod touch as part of your private cloud / iCloud.
- Create a folder that your FTP users will be accessing. I chose C:\FTP server for my common FTP server.
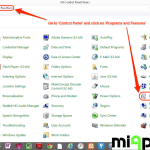
- Open the ‘Control Panel‘ and click on ‘Programs and Features’.
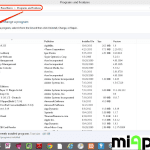
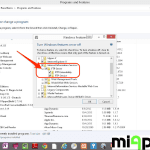
- Click on ‘Turn Windows features on or off”.
- Look for ‘Internet Information Services‘ and activate the check boxes ‘FTP Extensibility‘ and ‘FTP Service‘ and press ‘OK‘.
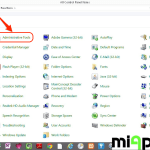
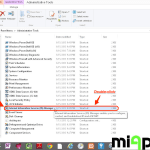
- Go back to the ‘Control panel‘ and click on ‘Administrative tools‘. Double-click ‘Internet Information Services (IIS) Manager‘.
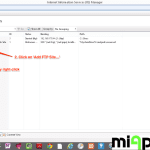
- In the freshly opened windows make a left-click on ‘Sites‘, follow by and right-click. Then choose ‘Add FTP Site…‘.
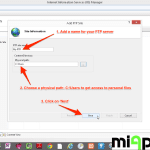
- Add a name for your FTP server like ‘My FTP‘ and select a physical path for your server. This will be the default directory to access your FTP server.
- For a common FTP server choose the folder you created in step 1: C:\FTP server. Click ‘Next‘.
- For your private cloud (access to your local files) choose C:\users. Click ‘Next‘.
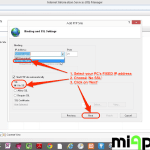
- In the next step select your Window PC’s FIXED IP address (Look for your IP address in your router setting. Fix the IP address there). Choose ‘No SSL‘ (If you do have an SSL certificate, you can choose either ‘Require SSL‘ or ‘Allow SSL‘.) and press ‘Next‘. Note: For security reasons be aware to require SSL, if you intend to make this FTP server accessible via the Internet!
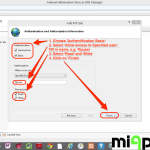
- Choose ‘Authentication Basic’ (require’s that the FTP users specify a login ID and password). For a common FTP server create a local user account and give it permission on the FTP content directory. If you prefer to use an already existing local computer user account instead of creating a new one, you can skip this step and you can directly assign permissions to the folder:
- For common FTP server select ‘Allow access to Specified user‘, fill in the local user account name, e.g. ‘ftpuser‘, select ‘Read‘ and ‘Write‘. Click on ‘Finish‘.
- For your private cloud (access to your local files) select ‘Allow access to‘: ‘All users‘ for general access of all users of your PC or ‘specified users‘ for dedicated users, select ‘Read‘ and ‘Write‘. Click on ‘Finish‘.
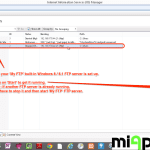
- Now your ‘My FTP’ built-in Windows 8 / 8.1 FTP server is set up. Click on ‘Start‘ to get it running. Note: If another FTP server is already running you first have to stop it and then start ‘My FTP‘ FTP server.
Now your built-in FTP server on Windows 8 or Windows 8.1 should be running. However, let us check 3 more thing:
Check FTP-Authentication in Windows 8 / Windows 8.1:
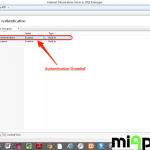
‘Basic Authentication‘ is enabled by default on Windows 8 and Windows 8.1, but you can cross check it. Open ‘Basic Authentication’ settings of the site and make sure ‘Basic Authentication‘ is enabled as shown below:
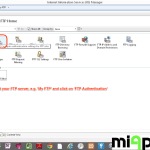
- Select your FTP server, e.g. ‘My FTP‘ and click on ‘FTP Authentication‘.
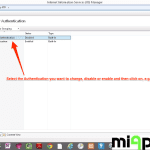
- Select the authentication you want to change, disable or enable and then click on, e.g. ‘Enable‘.
- Check if ‘Authentication‘ is ‘Enabled‘.
Check FTP-Authorization rules in Windows 8 / Windows 8.1:
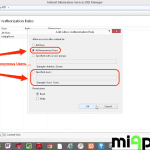
Now, lets set up a anonymous users access with read only permission:
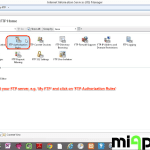
- Select your FTP server, e.g. ‘My FTP‘ and click on ‘FTP Authorization Rules‘.
- Select ‘All Anonymous Users, …‘ and check the rules (‘Read’ only access). Make sure that second rule also listed. You need to enable anonymous access under FTP Authentication settings of the site.
Check the Firewall!
To get access to your FTP server, you need to either disable the firewall (not recommended!) or allow FTP inbound and outbound traffic.
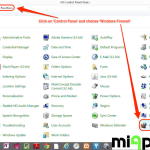
- Click on ‘Control Panel’ and choose ‘Windows Firewall‘.
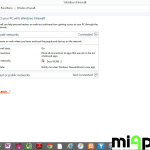
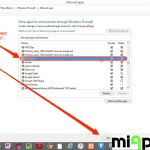
- Select ‘Allow an app…‘.
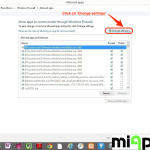
- Click on ‘Change settings‘.
- Choose ‘FTP Server‘ and select ‘Private‘ for your home network and, if needed, ‘Public‘ for access from outside your home network. Then Click ‘OK‘. Done!
Now, we’ve set up the built-in Windows FTP-server. You can use any FTP clients, e.g. with FTP apps on your iPhone, iPad or iPod touch and connect with a user name and password with write access, or anonymous user with read only access.
Stay tuned! 😉


15 Comments
Pingback: Enable Ping Reply and FTP Traffic in Windows 10 and Server | Nar Guide